Xplora X6 Play teardown
Introduction
Today, my daughter dropped her Xplora X6 Play phone watch onto a tiled floor which caused the “wake-up” button to stop working. The rest of the watch was OK, but if there was no way to wake the watch, it could only receive calls, not make calls. I figured it must be some loose connection or some soldering that have come loose, so repairing it could be simple.
Knowing how long time repairs can take when you send it in, and the price they take for repairing a watch, it is, unfortunately, seldom worth the effort. It must be said, that I never contacted Xplora to hear about the options for repairing. Their service might be stellar, but I needed the watch working quickly.
My wife and I quite like the Xplora phone watch for our daughter, as it is very limited in what it can do. No internet or nothing.
I strongly believe in repairing stuff instead of buying new, so I set out to try to fix the watch. This page is a collection of images of the process. Hopefully others can use it if they also want to look into repairing their watch. I apologize for the poor quality of the images, but they should be good enough to give an idea of how to open the watch.
Step 1. Opening the watch
Opening the watch proved to be much easier than I feared. After removing the wristbands, I used a small knife between the display and the case. I would have preferred to use plastic tools, but they were too big. However, once I got a gap big enough to fit the plastic tools, I proceeded with those.
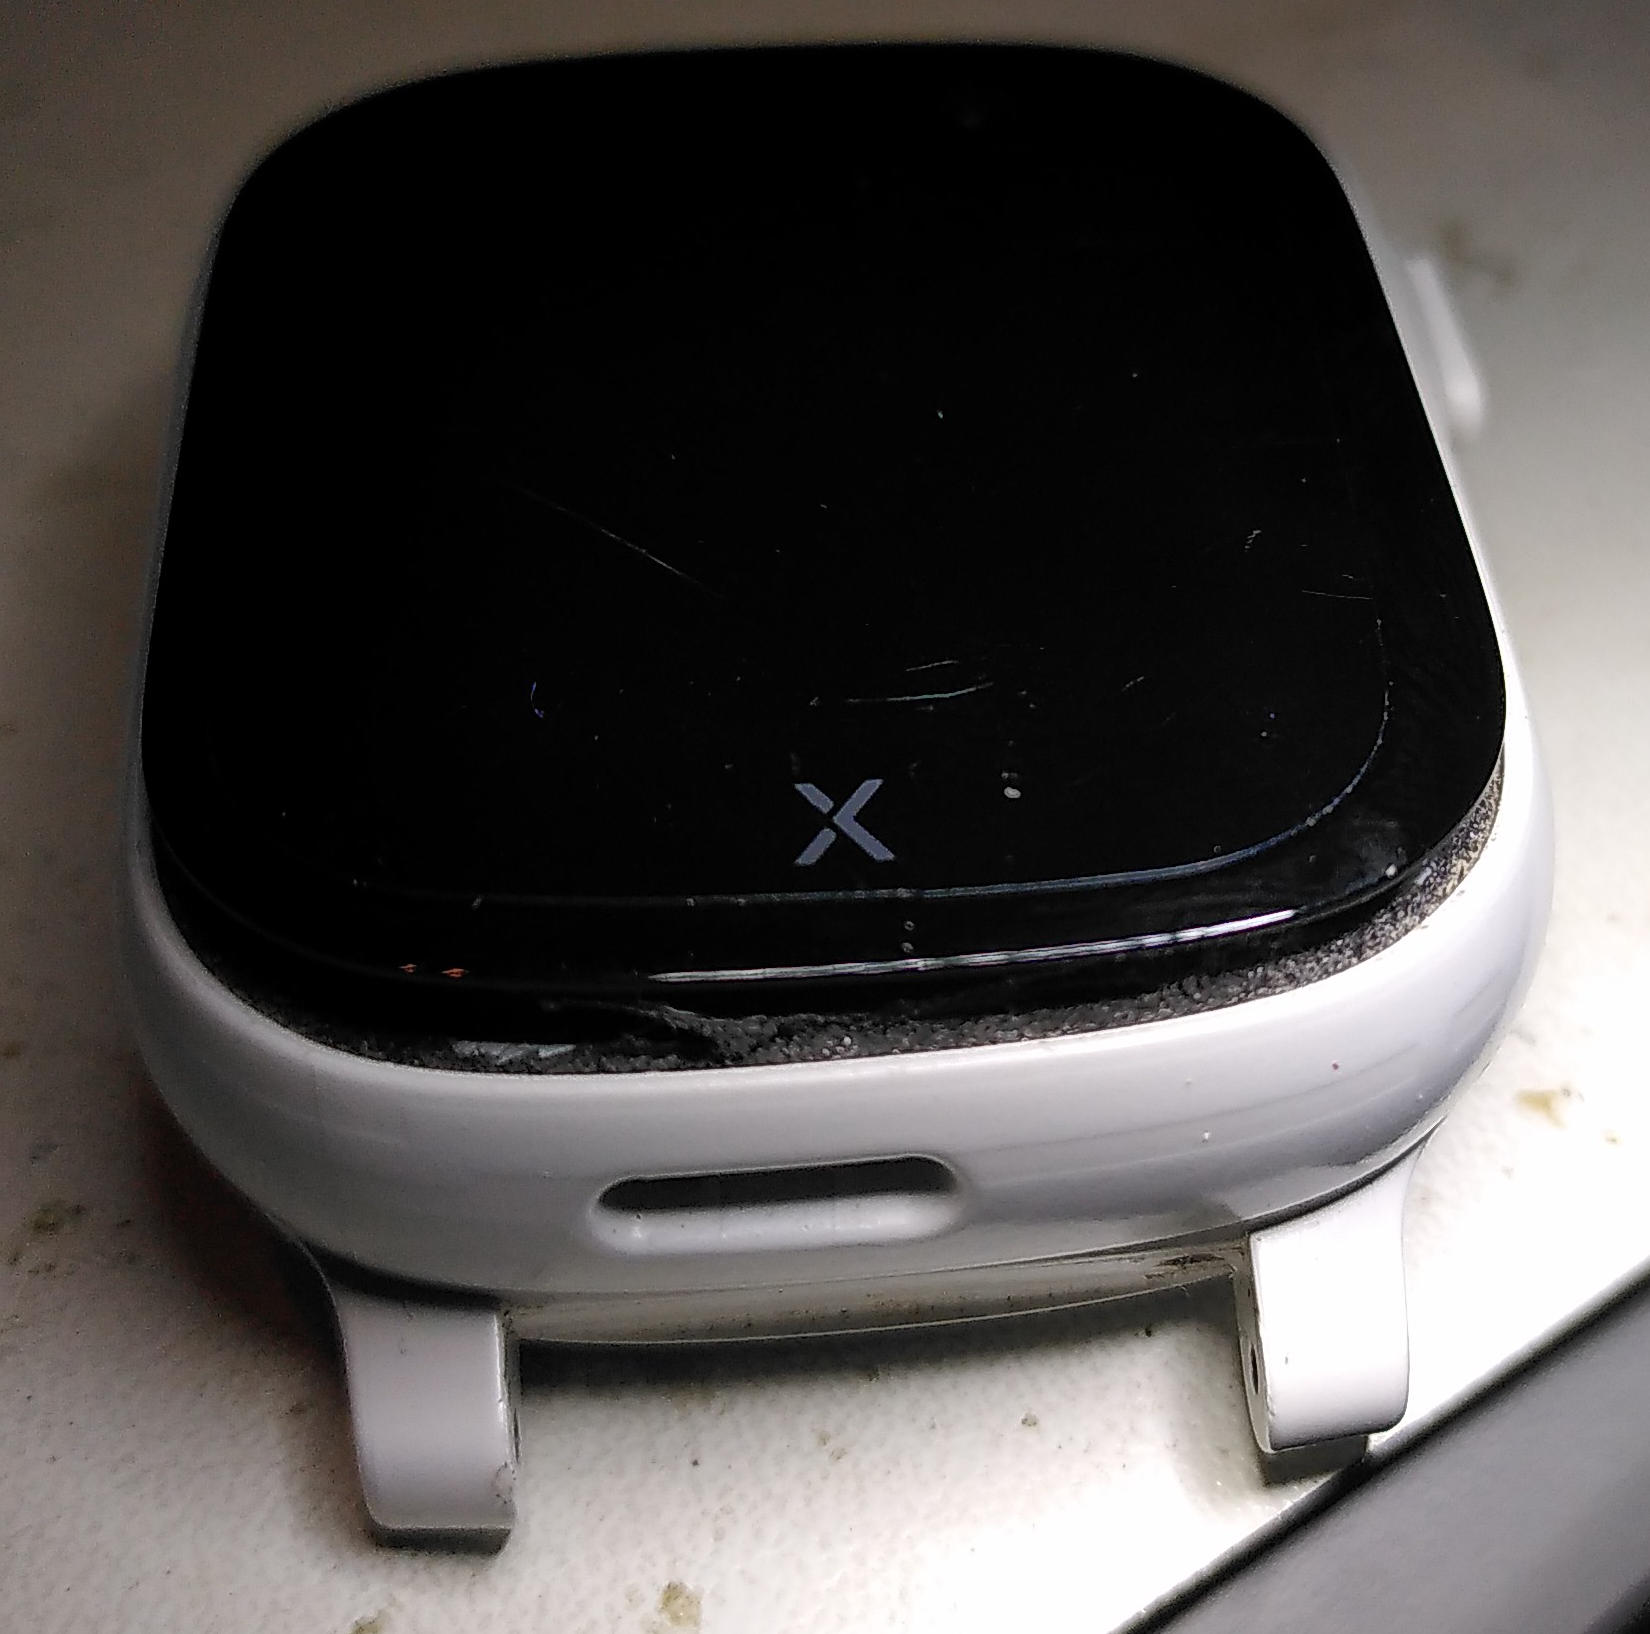
As with most watches, the display is glued together with the case. It was fairly easy to cut and pry open the watch, though. I never used any heating. Maybe using heating would have made less of a mess, and kept the water-proofness of the watch intact after reassembling, but I was in a rush.
In the picture below, you can see how the display is separated from the case. The glue is sort of foam-like.
Step 2: Removing screws
Once the display is loosened from the case, it kan be tilted to the side. Be careful not to damage the orange ribbon cable connecting the PCB to the display:
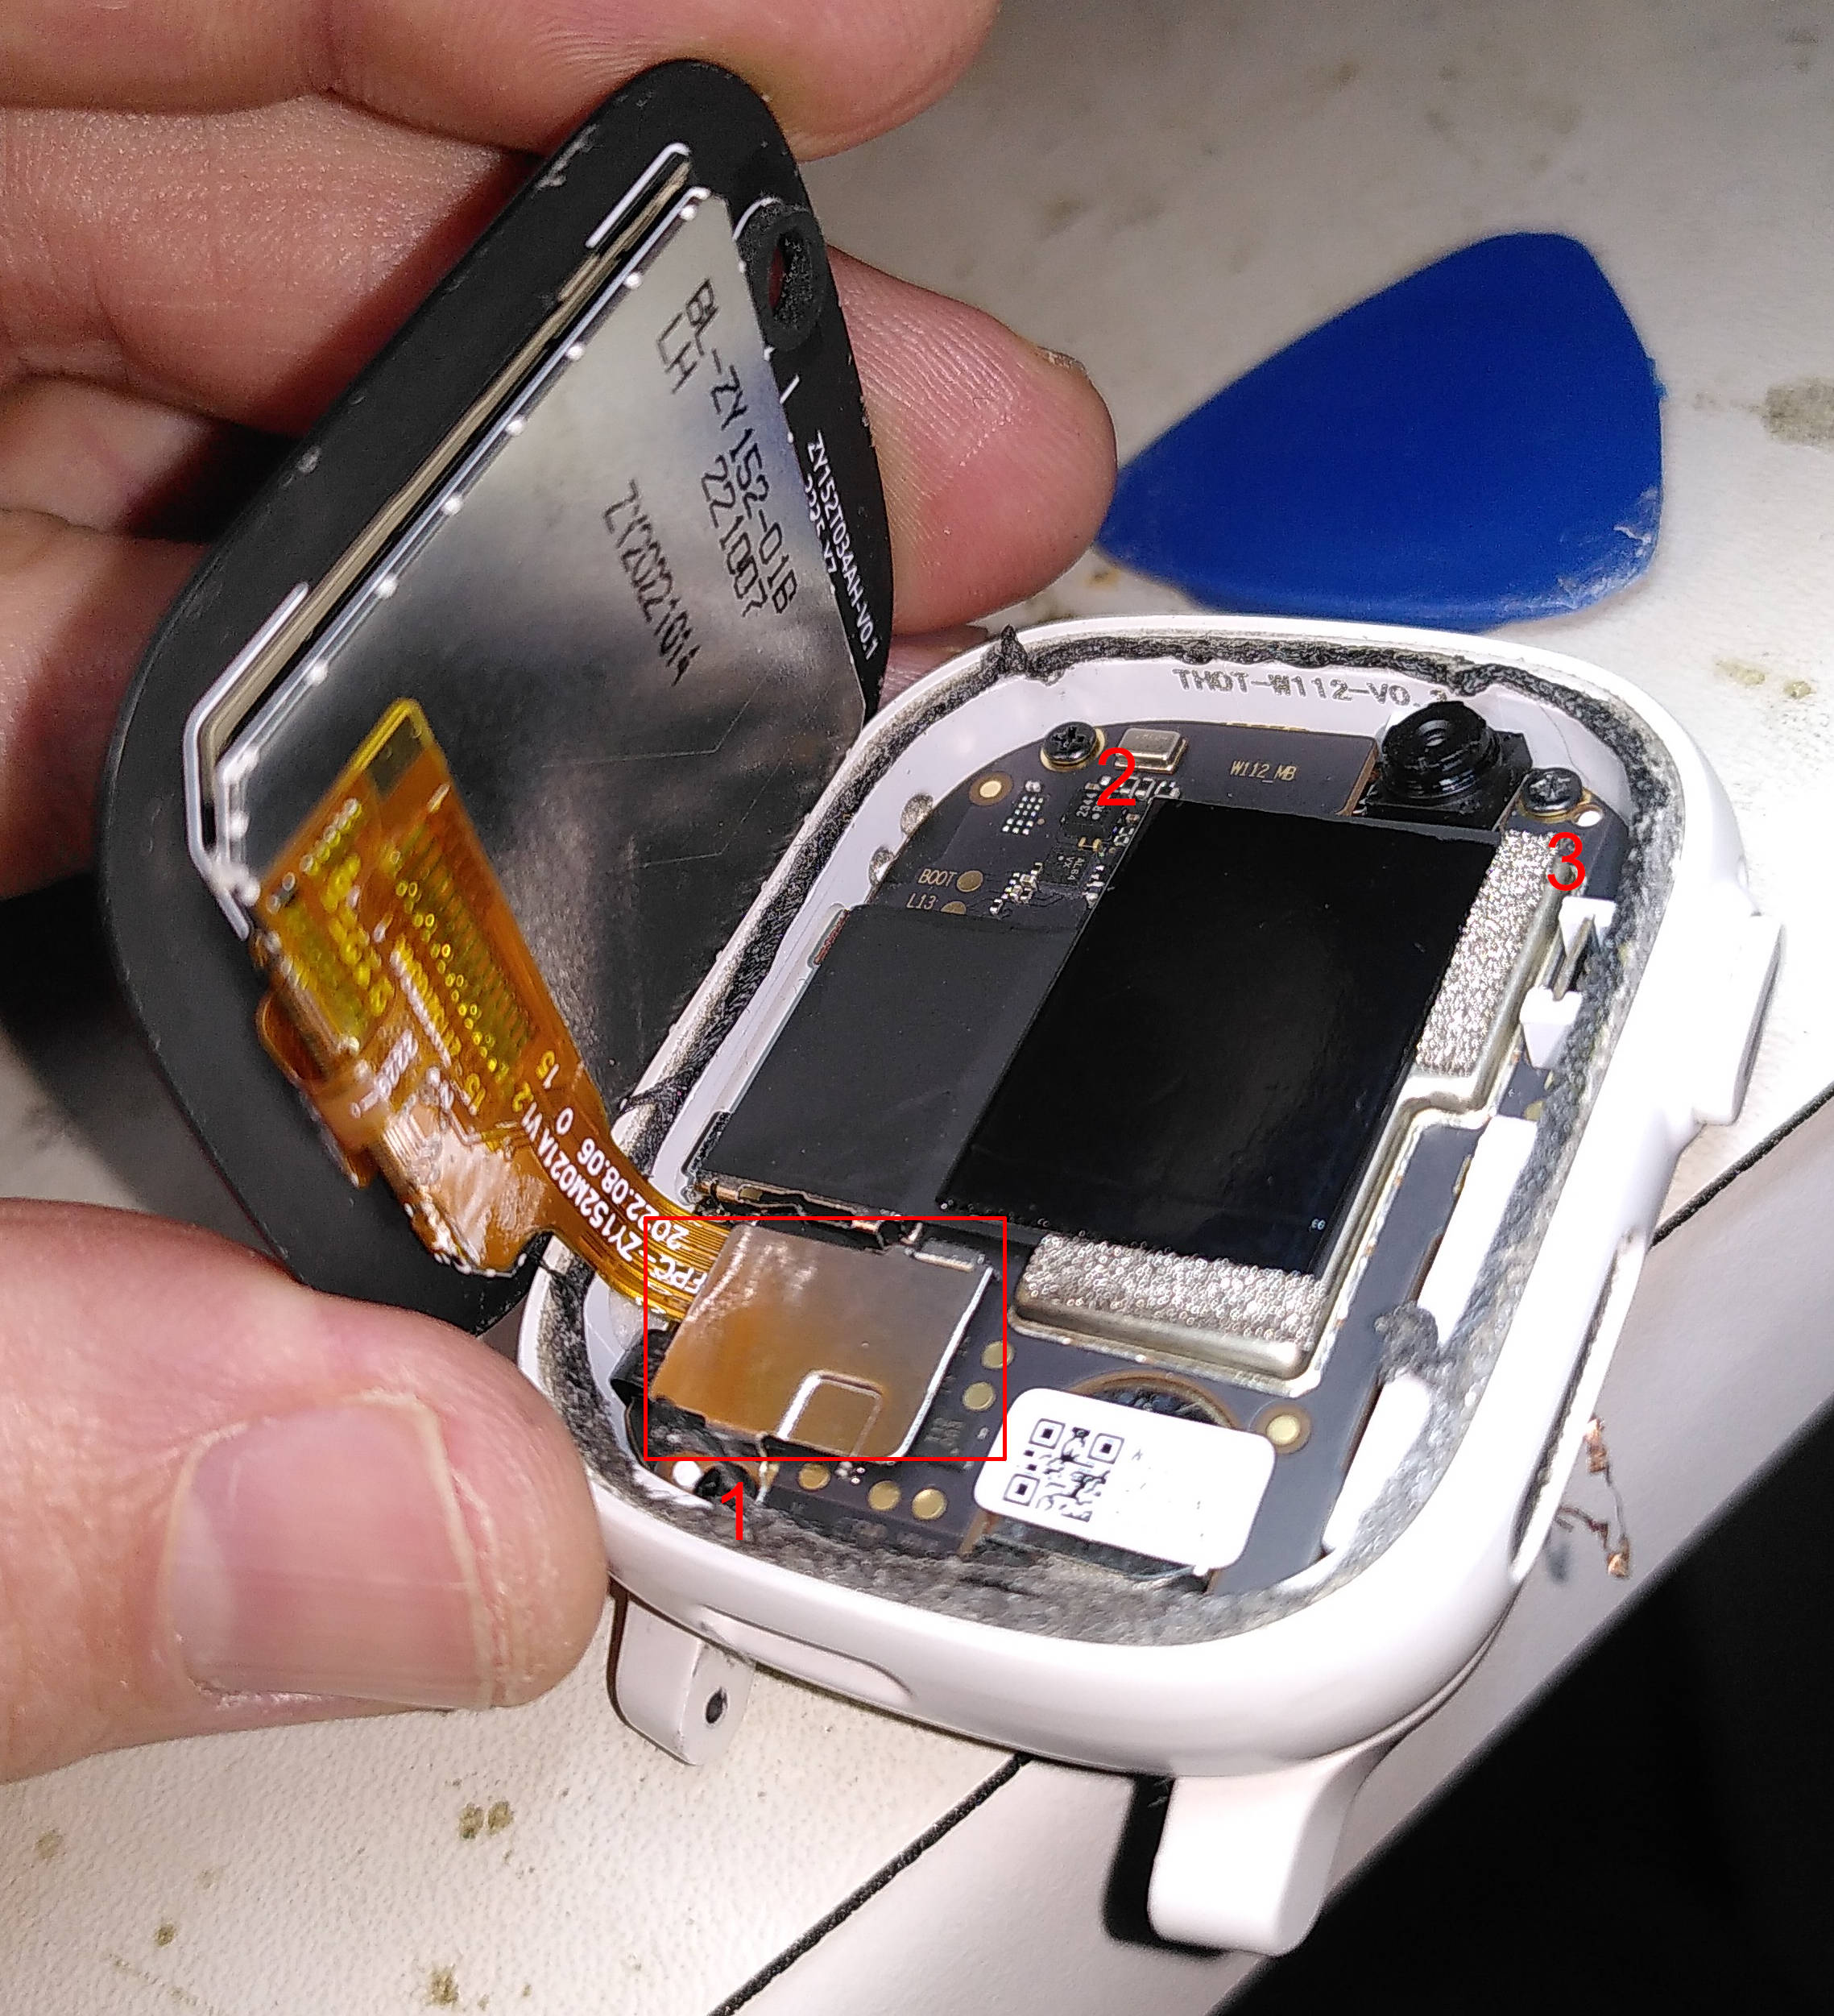
There are 3 screws to remove to take off the PCB. They are indicated on the picture with 1, 2 and 3. Also, you will need to remove the metal lid on top of the connectors (indicated with a red box).
Step 3: Taking off the connectors
There are 3 connectors. On large display connector (1), and two little ones (2) and (3). The third connector is located beneath the second connector.
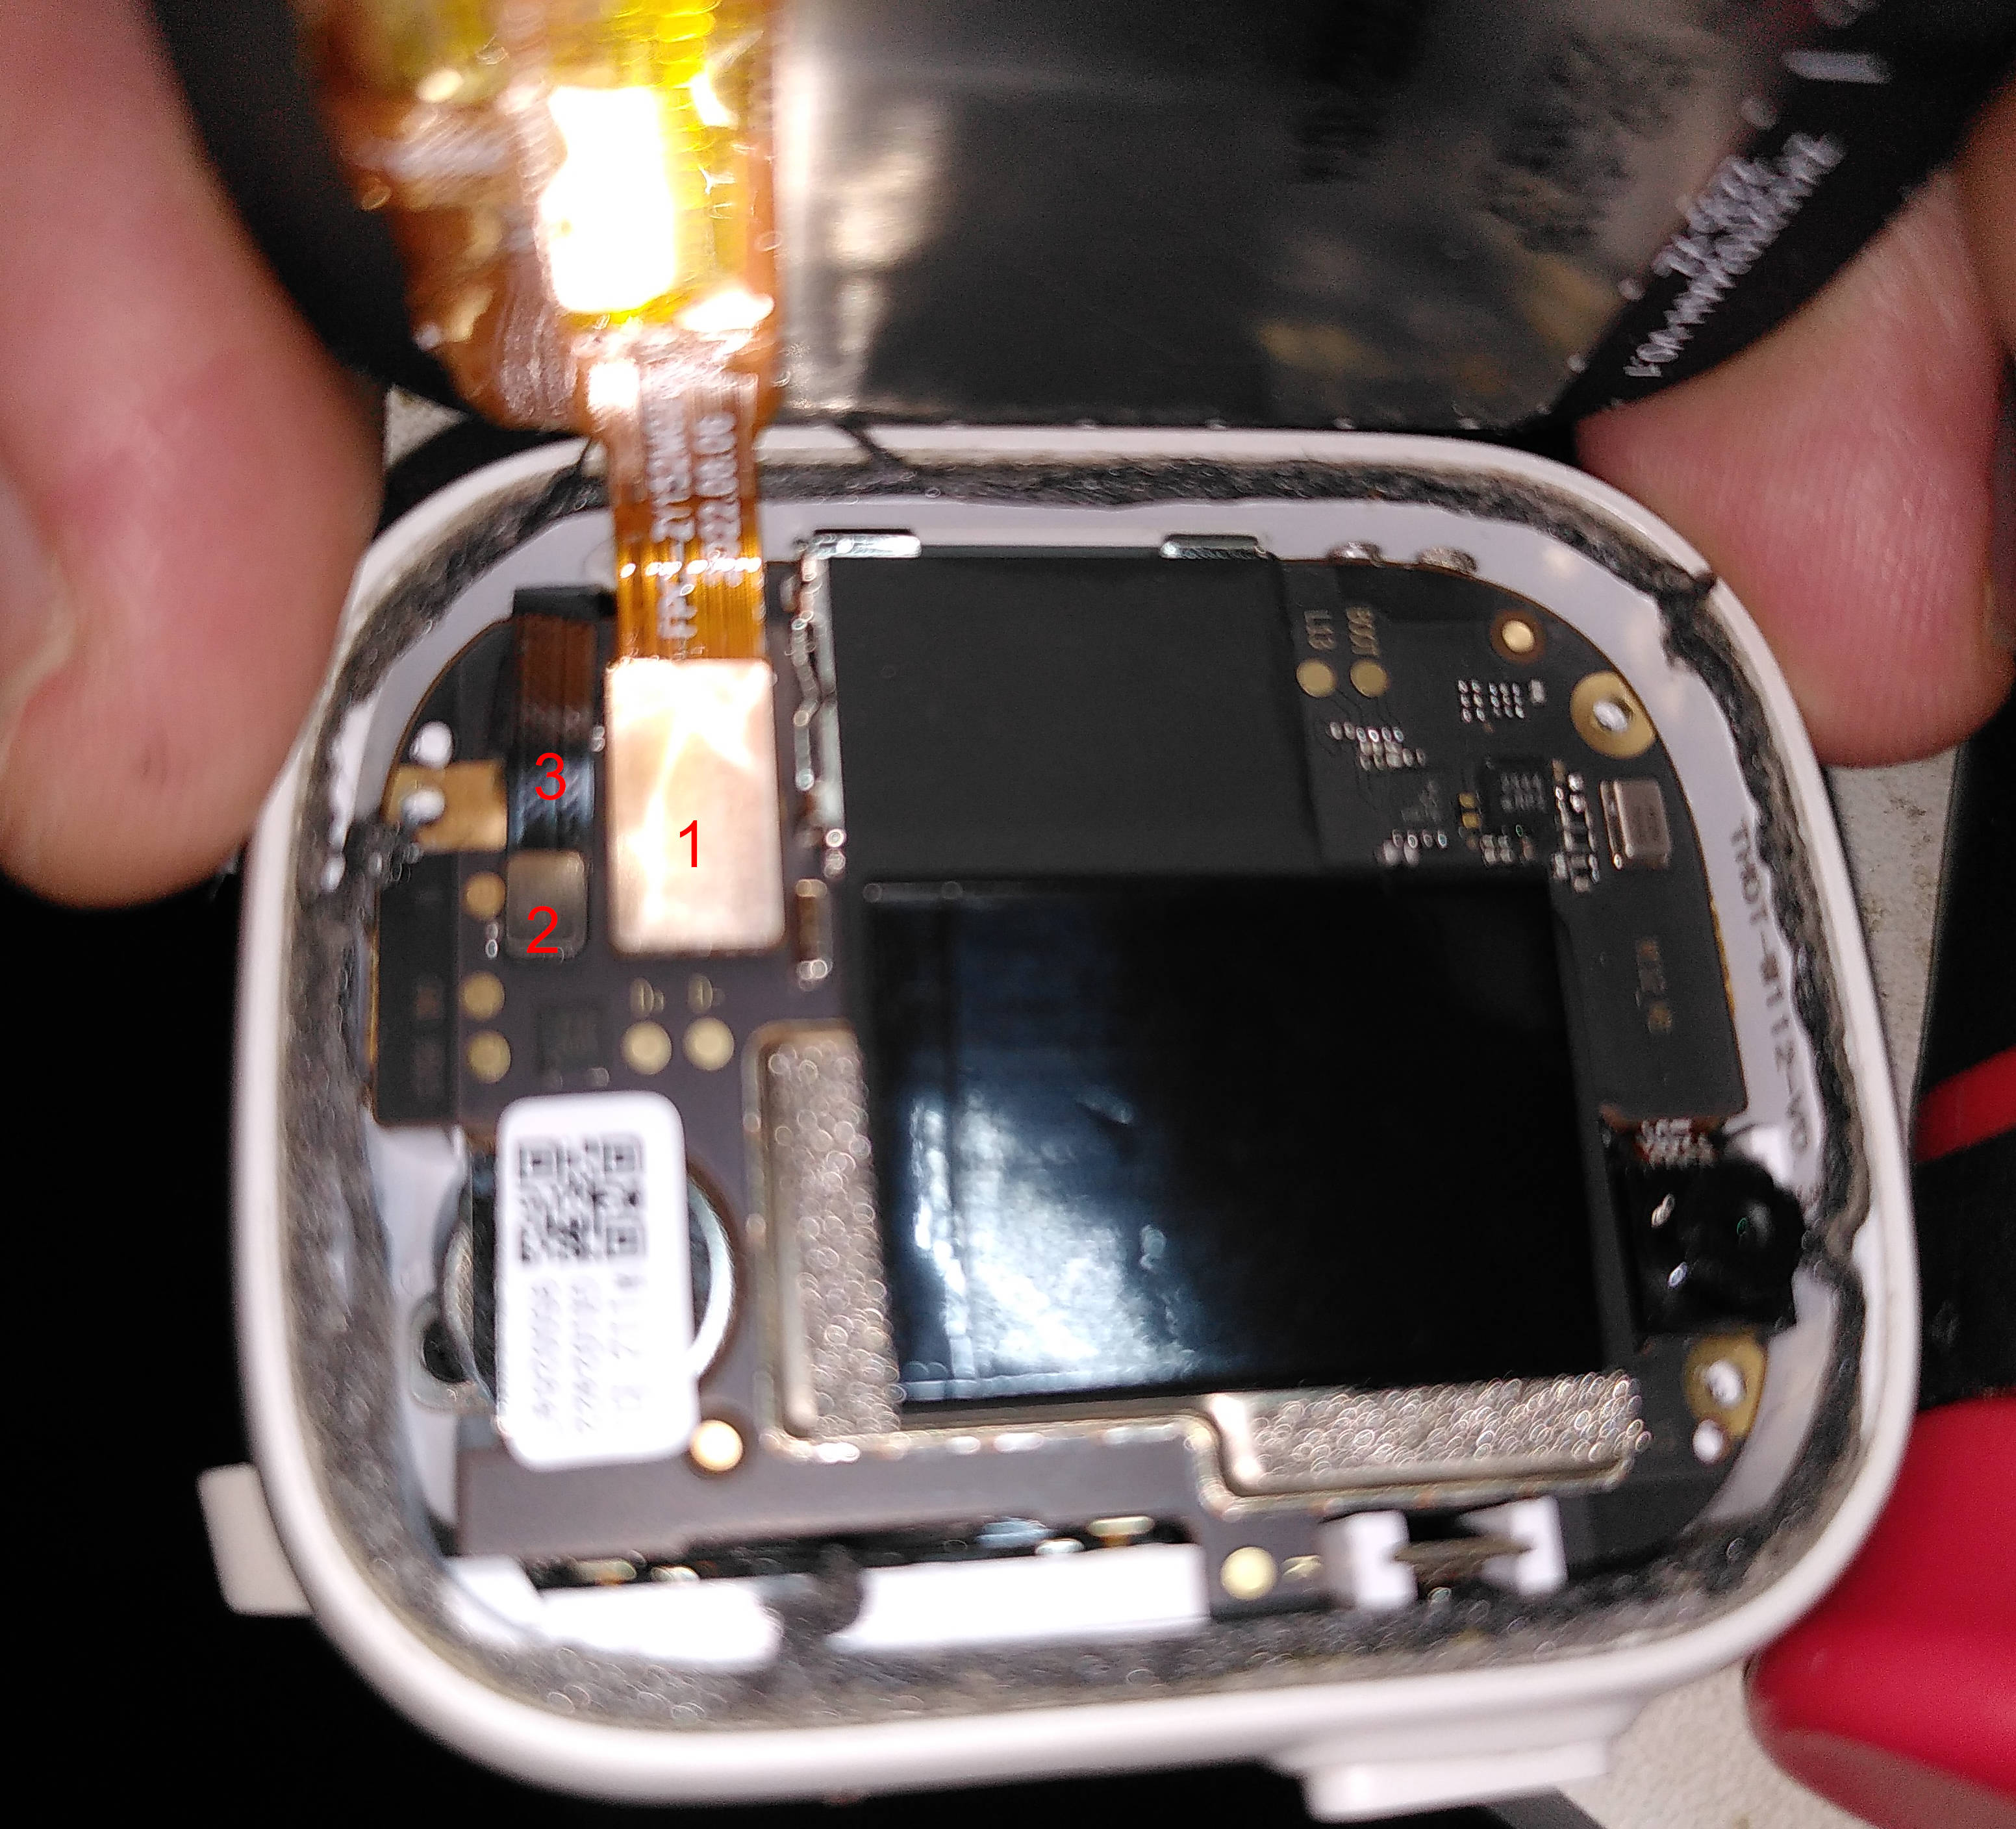
With the metal lid off, you can remove the connectors by gently “popping” them off with a tool.
Step 4: Tilting the PCB.
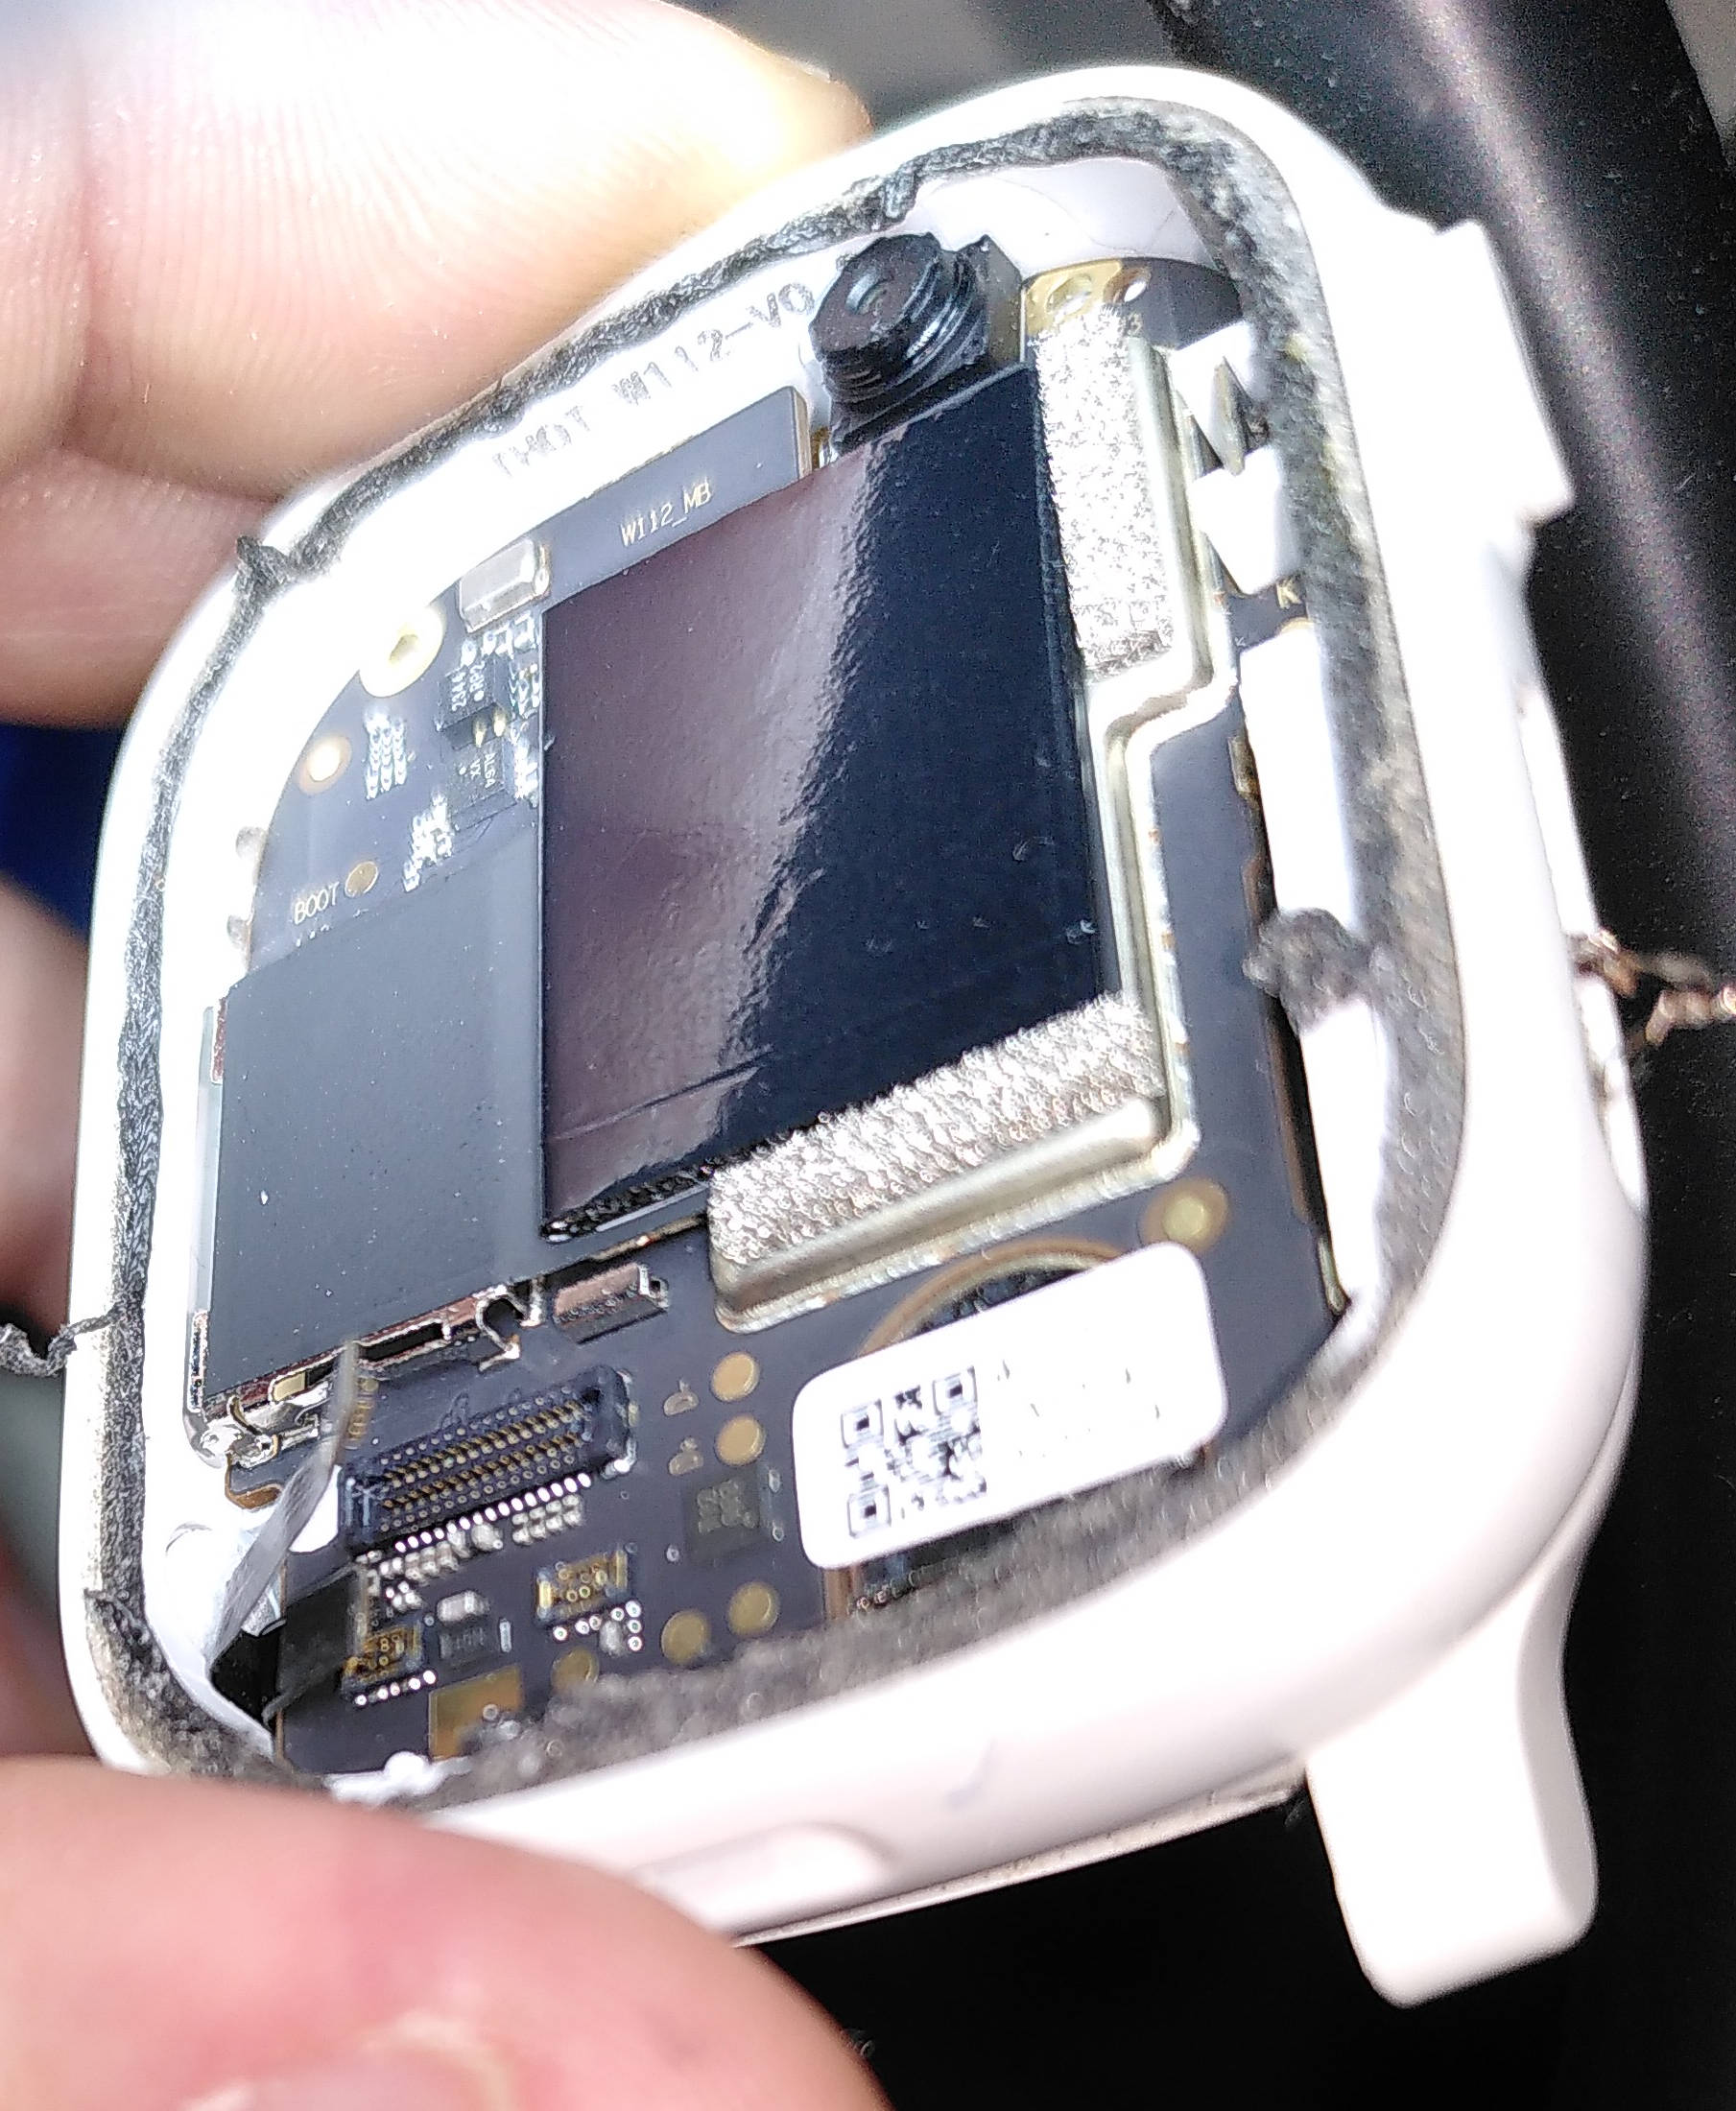
Now, the PCB can carefully be tilted out of the case. I used a small screwdriver to apply a bit of pressure so the PCB popped out.
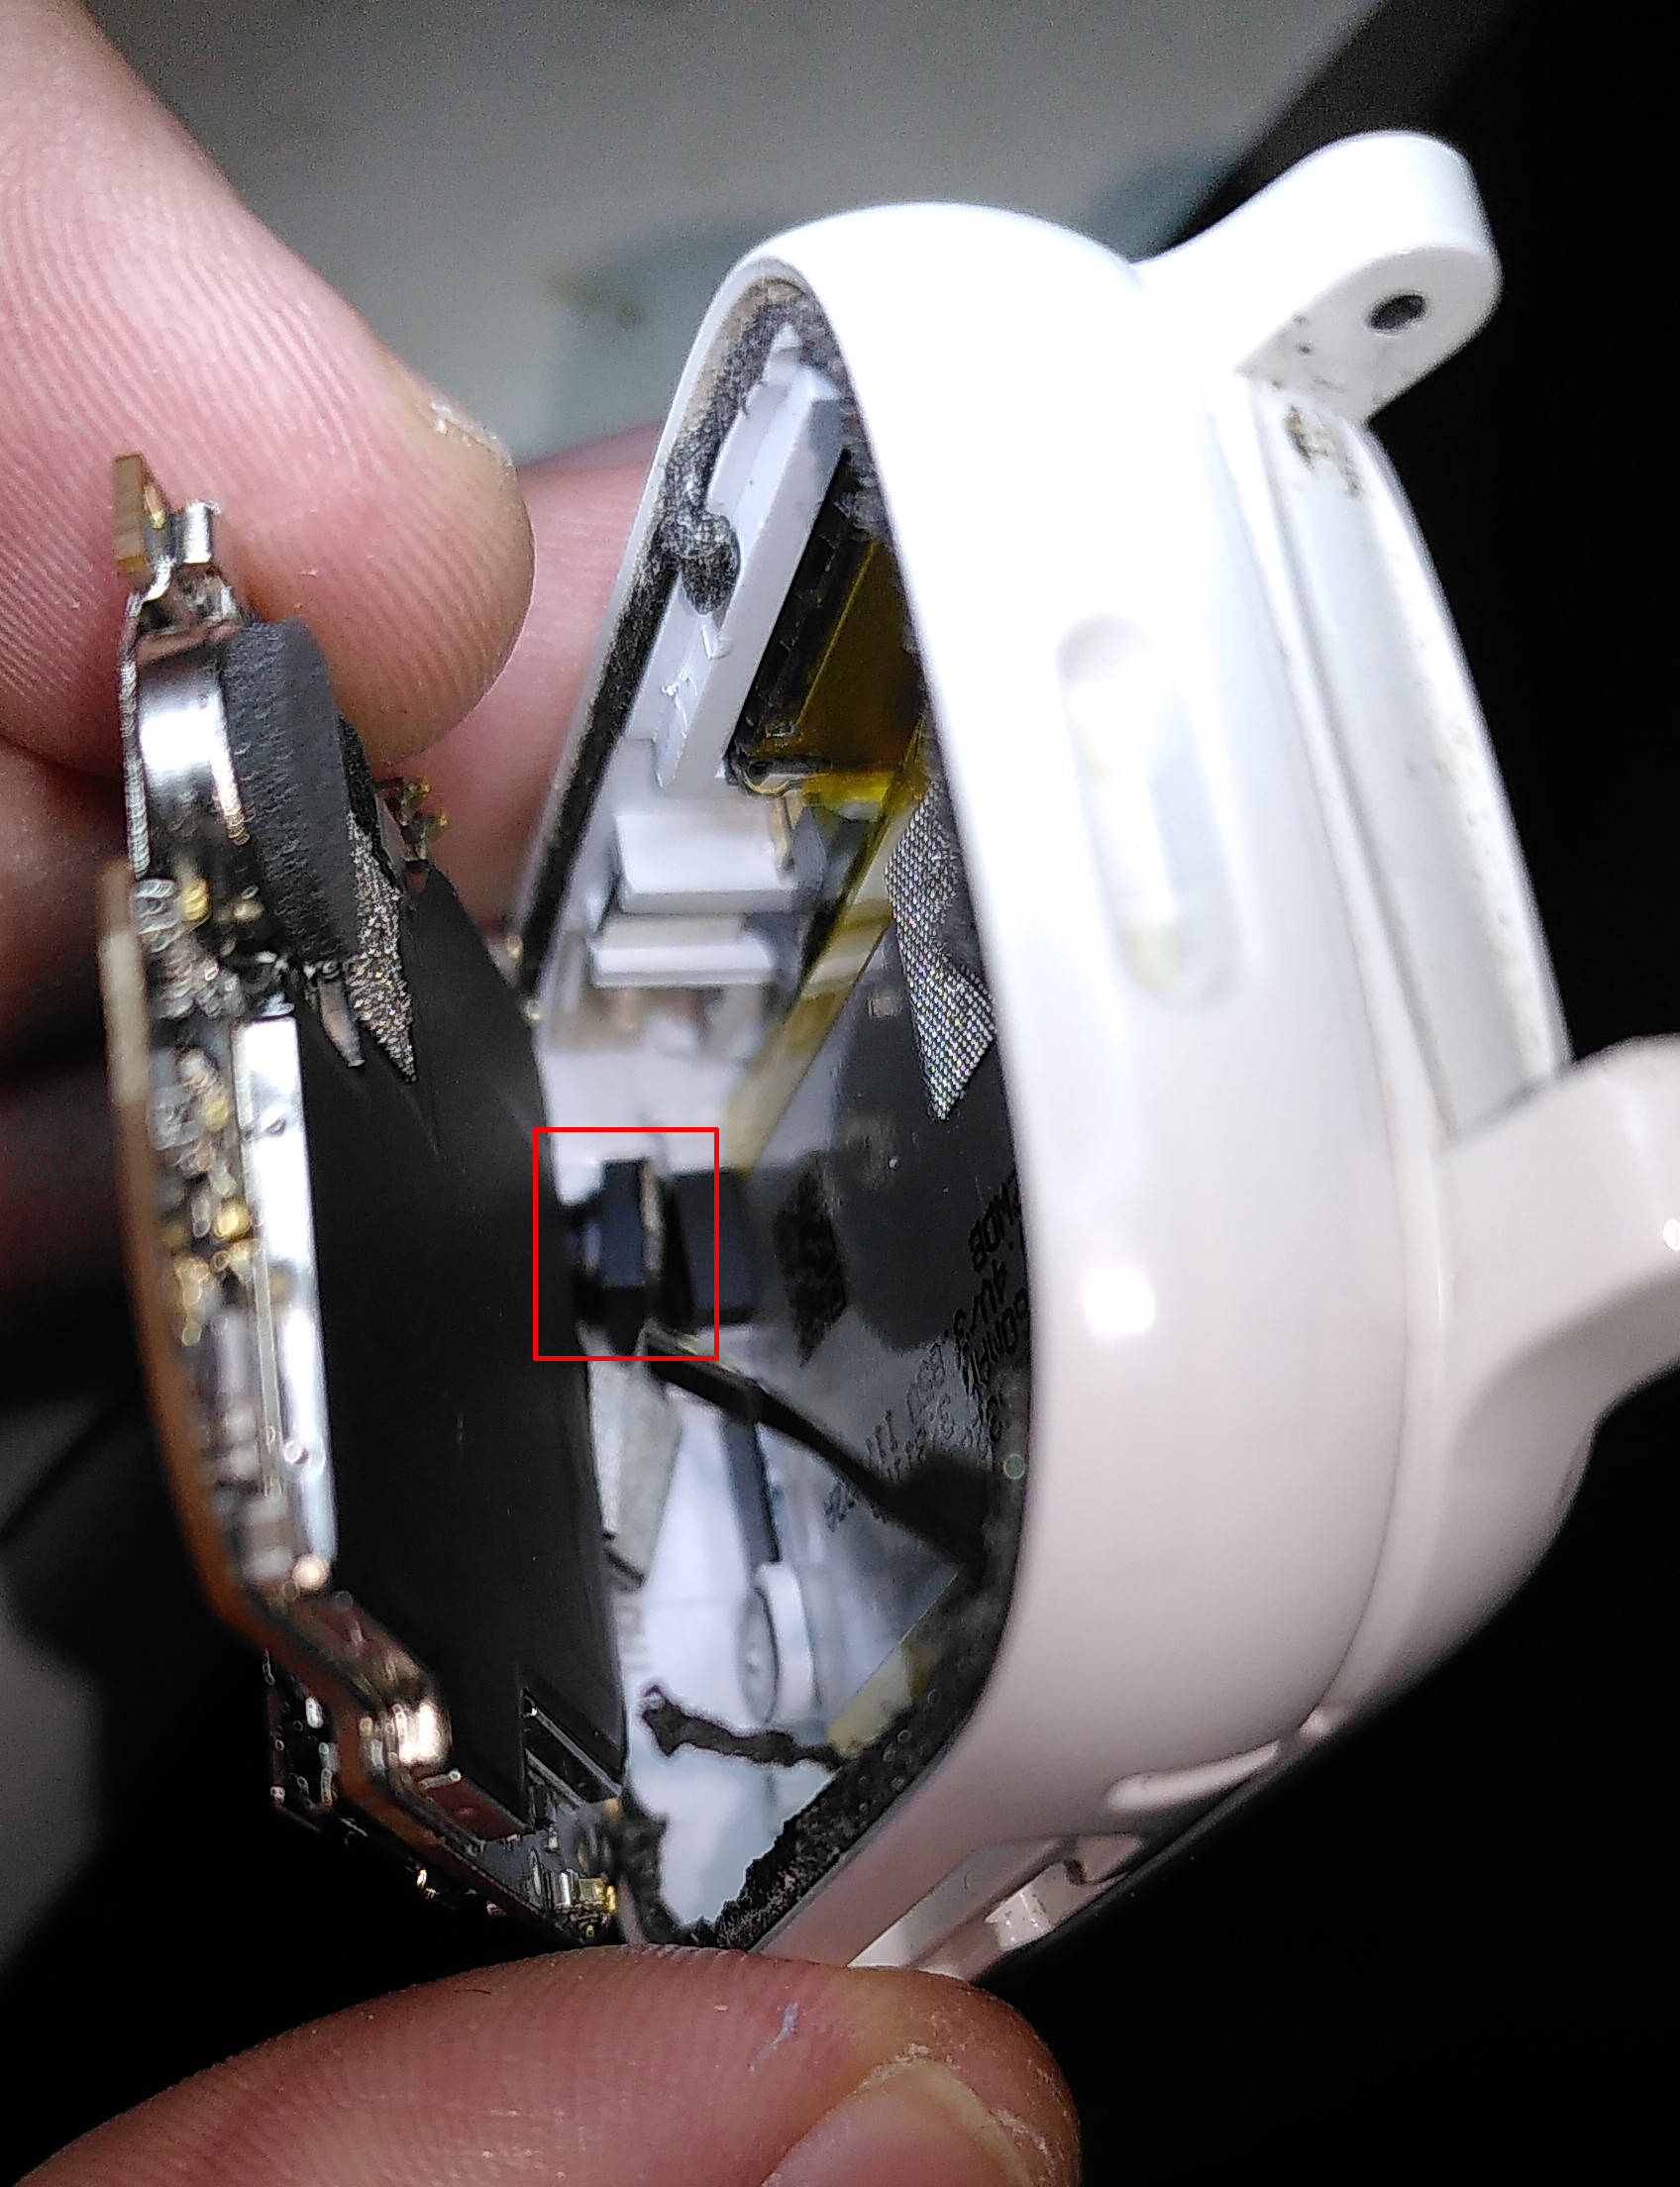
Notice, that the camera module might be a bit of a pain. It seems to be glued onto a little plastic piece. I had to remove it from the plastic piece to get off the main PCB. The camera module is indicated with a red box.
Step 5. Removing the PCB
The final step is to remove the PCB from the case. This can be seen in the following picture:
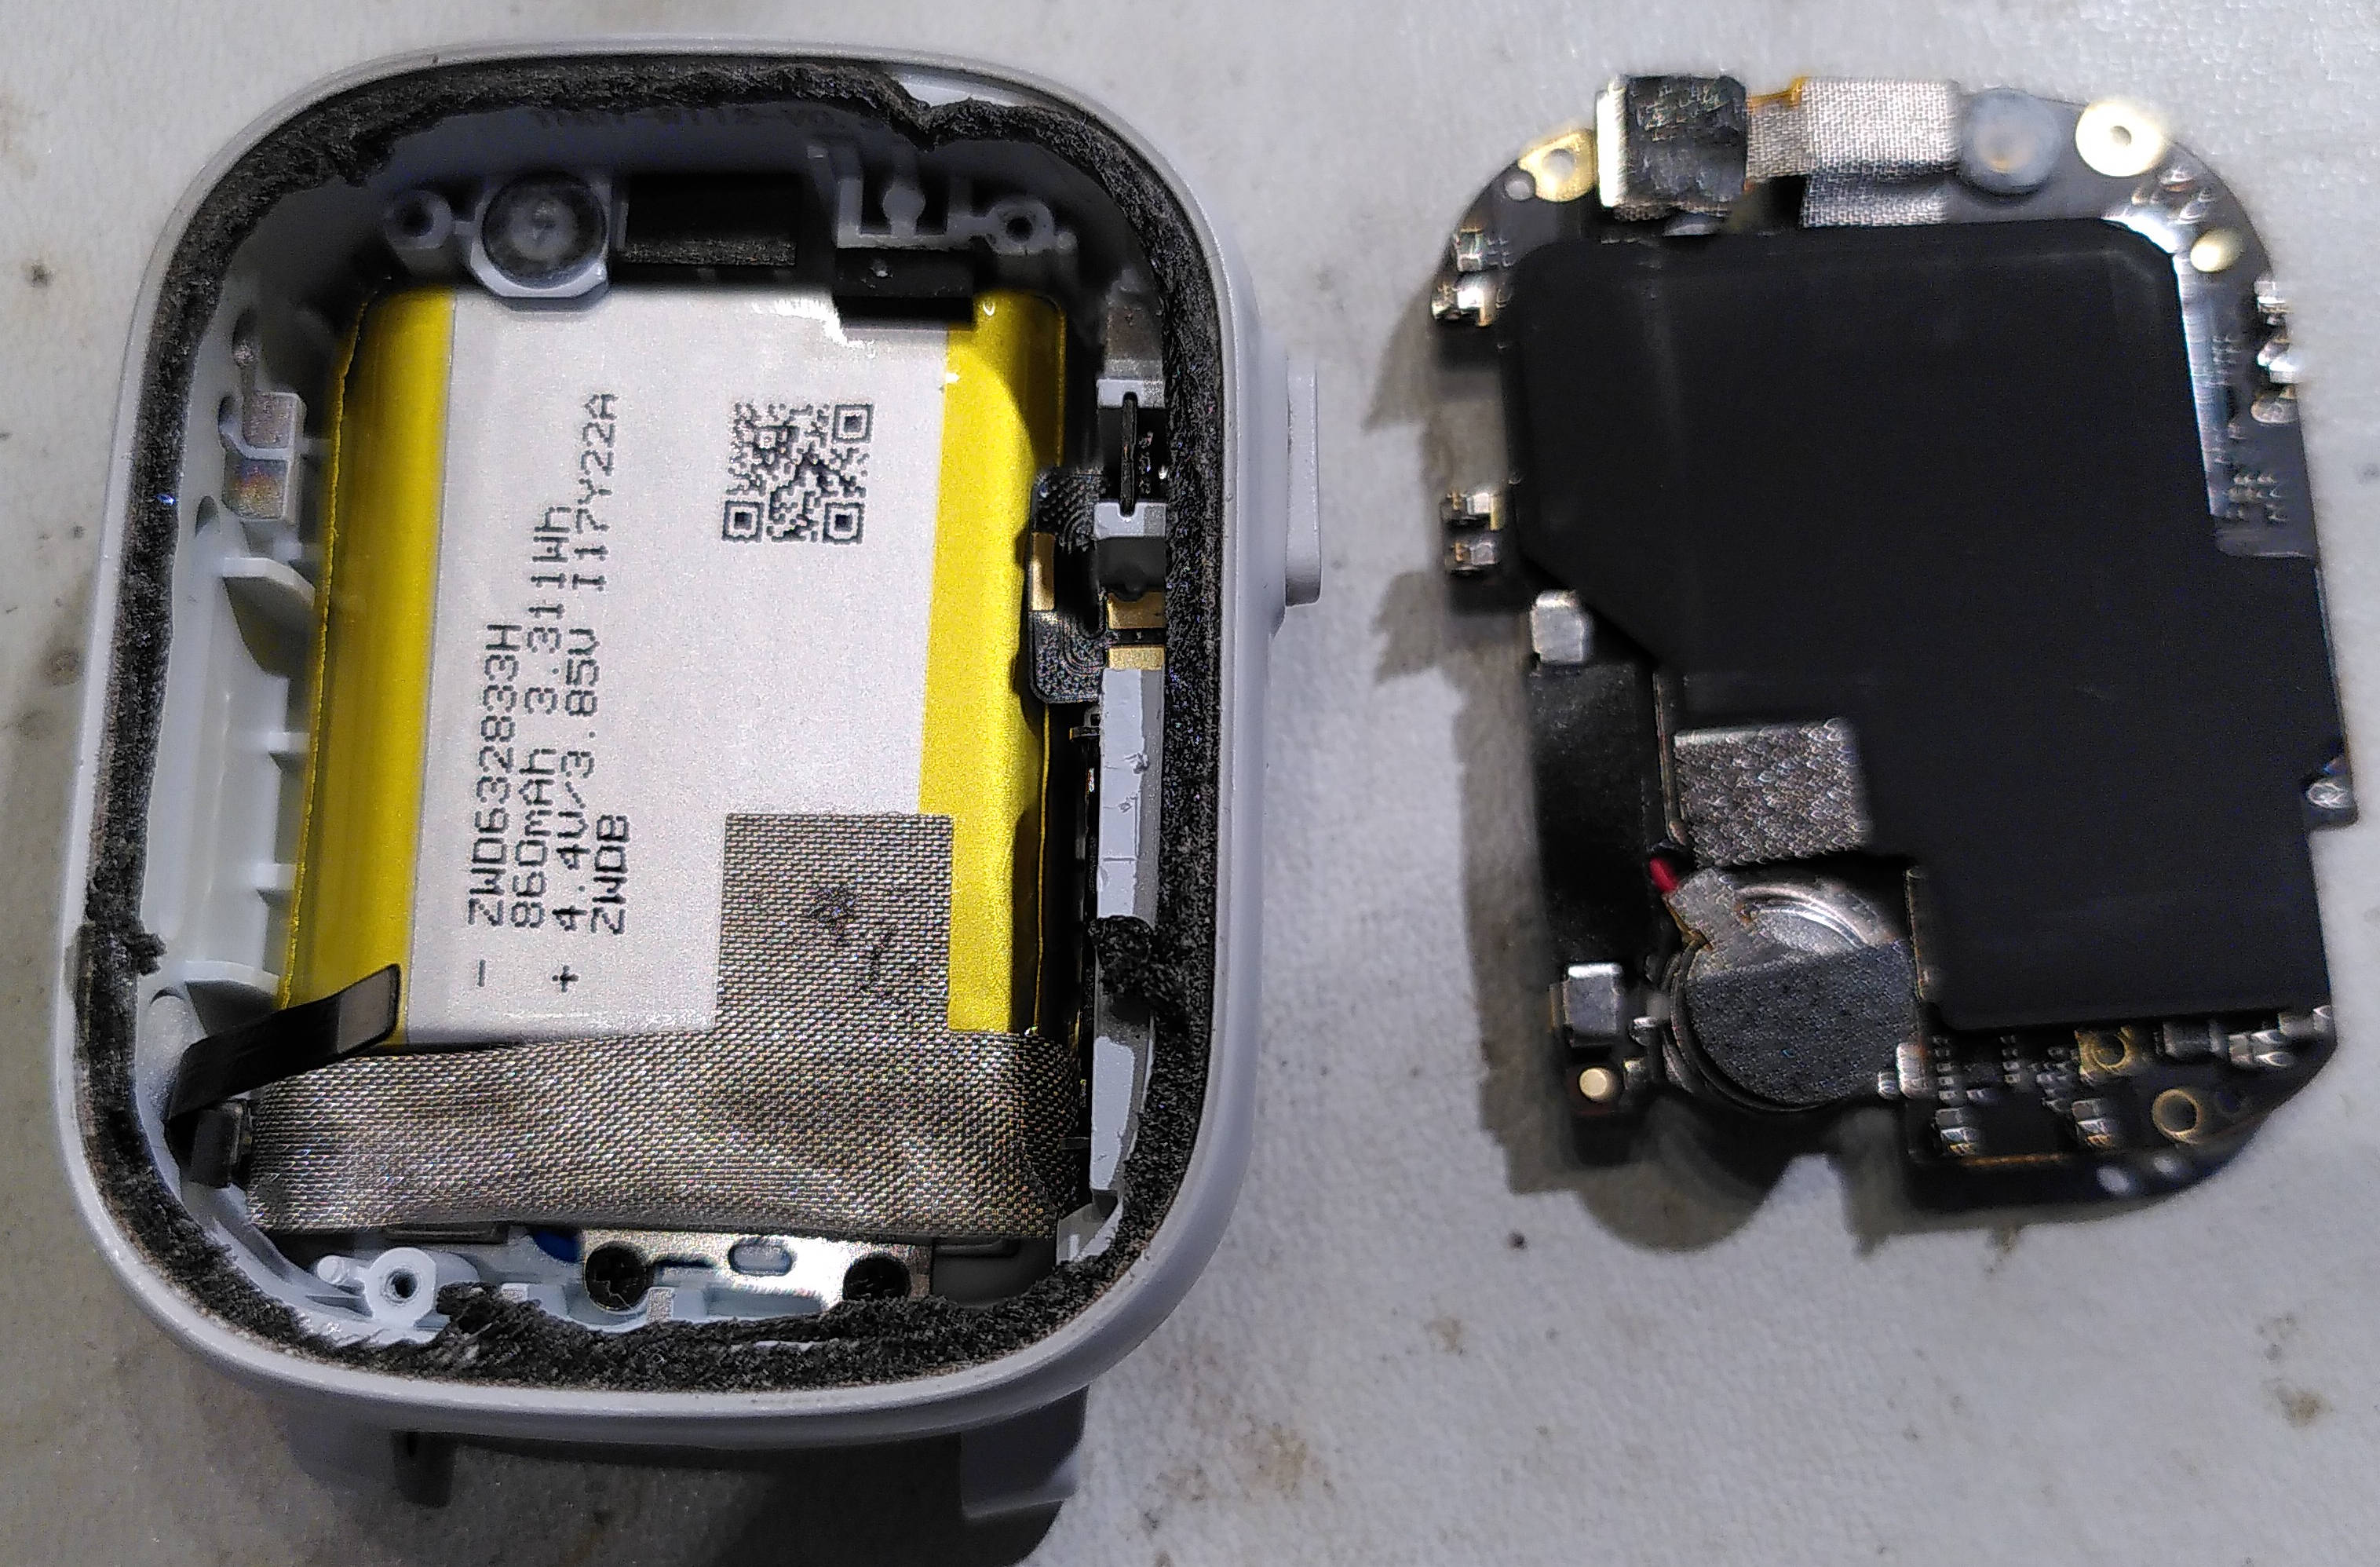
Further steps
This was as far as I got with the teardown. I now had access to the button and could probe for any short circuits.
I never found any, and I couldn’t see anything else wrong with the board, so I did the only thing I could and proceeded with cleaning all contacts with isopropyl alcohol. My hopes were slim, but just maybe that would sort out the problem.
Luckily, after assembling the watch again, and a few times where the watch just went into a bootloop, it seems that the button is working again.